stripe
Stripe Payment Links
Stripe Checkout Sessions
Stripe checkout sessions are ways to dynamically build checkout carts for a customer by building a server and sending product information about the products in the cart to stripe. Stripe then redirects the user to its own payment page to pay for the products.
Stripe config
The first thing to do is to initialize a stripe instance like so, using the secret api key from the stripe dashboard.
import { Stripe } from "npm:stripe";
export const stripe = new Stripe(process.env.STRIPE_SECRET_KEY);
Products in stripe
Products in stripe can be created manually in the stripe dashboard or dynamically. Here are the use cases for both:
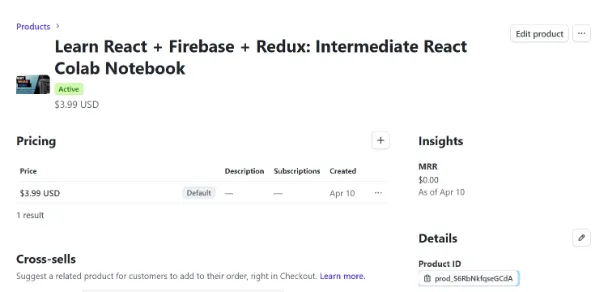
- manual creation: Best used for product or subscription that is fixed, i.e., selling a fixed digital product or service like online colab coding notebook.
- dynamic creation: Best used for products or subscriptions with add-ons and customizations that are best suited for creating a product at runtime.
When creating a product manually, the most important things to note are its price id and product id, which help you get information about the product during the checkout or during webhooks.
- price id: contains information about the purchase, like tax info, price point, etc.
- product: contains information about the product, like name, description, images, and any metadata you set on the product itself from the stripe dashboard.
You can easily fetch products and prices through the stripe SDK:
  async function getProductById(productId: string) {
    return await stripe.products.retrieve(productId);
  }

  async function getPriceById(priceId: string) {
    return await stripe.prices.retrieve(priceId);
  }
Checkout with products
The stripe.checkout.sessions.create() method redirects the client side to the stripe checkout page to buy a subscription or one-time product. Here are the options you can pass in to configure the checkout experience:
payment_method_types: Astring[]value of the different types of payment options to make available in the checkout page.mode:"payment"for one-time payments and"subscription"if buying a subscription.cancel_url: the URL of your server to redirect to if the user cancels the payment.success_url: the URL of your server to redirect to if the user successfully goes through with the payment.metadata: an object of typeRecord<string, string>that allows you to pass data through and retrieve it with webhooks. This is useful for passing data like who initiated the purchase and any other stuff.
The most important option here is line_items, which is an array of the different products to buy in the checkout cart. There are three different ways to register products for a checkout cart here:
- Register via
priceIdof a product - Register via the product id to the
price_data.productkey - Dynamically create a new product with the
price_data.product_datakey
async function checkout() {
  const response = await this.stripe.checkout.sessions.create({
	payment_method_types: ["card", "cashapp", "link"],
	mode: "payment", // for one-time payment
	cancel_url: "http://localhost:8000/checkout/cancel",
	success_url: "http://localhost:8000/checkout/success",
	line_items: [
		// example of registering product from price id
		{
			priceId: "price_1RCEhz4h8gpbjBP8iYDV1X8L",
			quantity: 1
		},
		// example of registering product from product id
		{
	      quantity: this.quantity,
	      price_data: {
	        product: this.productId,
	        currency: "usd",
	      },
	    },
		// example of registering product dynamically
		{
	      quantity: this.quantity,
	      price_data: {
	        currency: "usd",
	        product_data: {
	          name: "Buggati",
	          images: ["https://...."],
	          description: "Super fancy car",
	          metadata: {
		          payload: JSON.stringify({
			          instructionsLink: "https://..."
		          })
	          },
	        },
	        // Stripe requires the amount in cents
	        unit_amount: this.priceInDollars * 100,
	      },
	    }
	],
	// any metadata to pass so you can access in webhooks
	metadata: {
		payload: JSON.stringify({ userId: "waadliadsfas@mail.com" })
	},
  });

  const checkoutPageUrl = response.url;
}
Once you await the checkout session you will get back a response, with the most important thing being the unique stripe checkout page url located on response.url. This is the page we want to redirect our users to.
In summary, here is the flow:
- From the frontend, when the user is ready to purchase, make a request to our server at some arbitrary route like
/stripe/checkout, and await the response. - In that route, create a checkout session with the
stripe.checkout.sessions.create()method and get back the checkout page URL and return it to the frontend. - After getting back the response, manually navigate from the frontend to that checkout page link.
async function submitCart() {
  const response = await fetch("/stripe/checkout", {
	method: "POST"
  });
  const data = await response.json();
  window.location.href = data.redirectUrl as string;
}
Checkout with subscriptions
to checkout with subscriptions, you use the same stripe checkout API but this time you'll do two different things:
- Use a product/price that references a recurring subscription
- change the
modeto"subscription" - Use webhooks to listen for customer subscription created, updated, deleted
- Handle billing portal for users to cancel their subscription.
The main difference for subscriptions is that Stripe creates a customer object in the backend, and a subscription is always tied to a customer.
IMPORTANT
It is extremely important that you limit customers to only one subscription in stripe. To do this, go to the settings here to enable that: https://dashboard.stripe.com/settings/checkout#subscriptions
creating the subscription
The stripe.checkout.sessions.create() method works the same for subscription but we have to change a few things in the options object:
mode: set this to"subscription"for recurring paymentscustomer_email: you must provide the customer's email so that a customer object is created behind the scenes in stripe.
Then instead of getting back a url, you can get back a session id from the session.id object and pass that to the frontend to redirect to the subscription checkout page.
import { NextResponse } from 'next/server';
import { stripe } from '@/utils/stripe';

export async function POST(request: Request) {
    try {
        const { priceId, email, userId } = await request.json();

        const session = await stripe.checkout.sessions.create({
            metadata: {
                user_id: userId,
            },
            customer_email: email,
            payment_method_types: ['card'],
            line_items: [
                {
                    // base subscription
                    price: priceId,
                },
                {
                    // one-time setup fee
                    price: 'price_1OtHdOBF7AptWZlcPmLotZgW',
                    quantity: 1,
                },
            ],
            mode: 'subscription',
            success_url: `${request.headers.get('origin')}/success`,
            cancel_url: `${request.headers.get('origin')}/cancel`,
        });

        return NextResponse.json({ id: session.id });
    } catch (error: any) {
        console.error(error);
        return NextResponse.json({ message: error.message }, { status: 500 });
    }
}
Now in the frontend, follow these steps:
- load the client-side stripe library
- fetch your create subscription endpoint and retrieve the session id
- use the
stripe.redirectToCheckout()method, passing in the session id to redirect the user to the subscription checkout page.
import { loadStripe } from '@stripe/stripe-js';

async function goToCheckout() {
	// 1. load stripe
    const stripe = await loadStripe(
	    process.env.NEXT_PUBLIC_STRIPE_PUBLISHABLE_KEY!
	);

	// 2. fetch create subscription endpoint, which returns session
    const response = await fetch('/api/checkout', {
        method: 'POST',
        headers: {
          'Content-Type': 'application/json',
        },
        body: JSON.stringify({ priceId: 'price_1OtHkdBF7AptWZlcIjbBpS8r', userId: data.user?.id, email: data.user?.email }),
      });
    const session = await response.json();

    // 3. redirect via session id
    await stripe?.redirectToCheckout({ sessionId: session.id });
}
webhooks
In your webhooks, these are the 4 events you'll want to listen for:
"checkout.session.completed": the user buys the subscription"customer.subscription.created": the subscription is created and becomes active."customer.subscription.updated": the subscription is updated, like is set for cancellation or something else."customer.subscription.deleted": the subscription is cancelled - the user is no longer subscribed.
import { NextRequest, NextResponse } from 'next/server';
import { stripe } from '@/utils/stripe';
import { supabaseAdmin } from '@/utils/supabaseServer';
import Stripe from 'stripe';

export async function POST(request: NextRequest) {
    try {
      const rawBody = await request.text();
      const signature = request.headers.get('stripe-signature');

      let event;
      try {
        event = stripe.webhooks.constructEvent(rawBody, signature!, process.env.STRIPE_WEBHOOK_SECRET!);
      } catch (error: any) {
        console.error(`Webhook signature verification failed: ${error.message}`);
        return NextResponse.json({ message: 'Webhook Error' }, { status: 400 });
      }

      // Handle the checkout.session.completed event
      if (event.type === 'checkout.session.completed') {
        const session: Stripe.Checkout.Session = event.data.object;
        console.log(session);
        const userId = session.metadata?.user_id;

        // Create or update the stripe_customer_id in the stripe_customers table
        const { error } = await supabaseAdmin
        .from('stripe_customers')
        .upsert({
            user_id: userId,
            stripe_customer_id: session.customer,
            subscription_id: session.subscription,
            plan_active: true,
            plan_expires: null
        })


      }

      if (event.type === 'customer.subscription.updated') {

      }

      if (event.type === 'customer.subscription.deleted') {

      }

      return NextResponse.json({ message: 'success' });
    } catch (error: any) {
      return NextResponse.json({ message: error.message }, { status: 500 });
    }
  }
Billing portal
The billing portal is just a stripe-managed URL you can redirect the user to. Use the stripe.billingPortal.sessions.create() method, passing in the customer id and the return url to grab a billing portal session and the url off of that.
You can then manually redirect the user to the billing portal URL.
import { stripe } from "@/utils/stripe";


export async function createPortalSession(customerId: string) {
    const portalSession = await stripe.billingPortal.sessions.create({
        customer: customerId,
        return_url: `http://localhost:3000`,
      });

      return { id: portalSession.id, url: portalSession.url };
}
Checkout sessions with payment links
You can take advantage of prebuilt payment links if you have static products that don't change, and then just handle app logic with webhooks instead. These payment links link directly to a checkout session that stripe will create for you, and you don't need a return URL.
- Go to stripe, on a product you made, create a payment link for it. Copy that link.
- When the user wants to pay, redirect them to the payment link.
- Setup webhook listeners to know when a new customer in stripe was created, a product was bought, an invoice made, etc., and there implement your database logic to change the user to pro or say they have bought something.
Embedded checkout sessions
embedded checkout sessions give you the flexibility of handling payments through your UI without users being redirected to Stripe. It offers a better user experience and more customization of how the payment looks like.
There are a few steps to follow:
- Create a POST handler on your server to create the stripe payment
- Create a checkout session as usual but with
ui_modeproperty set to"embedded"to enable embedded payments in stripe. - From the checkout session, get the session id and the session client secret and serve that as the response.
- Create a checkout session as usual but with
- In the frontend, use the Stripe client SDK to render stripe provided components, passing the client secret and session id.
- In your backend, handle the return URL and optionally check the session status to see if the payment went through.
step 1
When the frontend calls this API route, create embedded checkout session through ui_mode: "embedded" and return the checkout session URL to redirect to.
For extra security and to unique identify a user based on their payment session, we pass a session_id= query param.
import { NextResponse } from 'next/server';
import { stripe } from '@/utils/stripe';

export async function POST(request: Request) {
    try {
        const { priceId } = await request.json();

        const session = await stripe.checkout.sessions.create({
            ui_mode: 'embedded',
            payment_method_types: ['card'],
            line_items: [
                {
                    price: priceId,
                },
            ],
            mode: 'subscription',
            // make sure to handle this later
            return_url: `${request.headers.get('origin')}/return?session_id={CHECKOUT_SESSION_ID}`,
        });

		// must return session id and client secret
        return NextResponse.json({ id: session.id, client_secret: session.client_secret });
    } catch (error: any) {
      console.error(error);
        return NextResponse.json({ message: error.message }, { status: 500 });
    }
}
step 2
Render the <EmbeddedCheckout /> component from within the <EmbeddedCheckoutProvider /> provider.
"use client";
import { loadStripe } from "@stripe/stripe-js";
import {
  EmbeddedCheckoutProvider,
  EmbeddedCheckout,
} from "@stripe/react-stripe-js";
import { useCallback, useRef, useState } from "react";

export default function EmbeddedCheckoutButton() {
  const stripePromise = loadStripe(
    process.env.NEXT_PUBLIC_STRIPE_PUBLISHABLE_KEY!
  );
  const [showCheckout, setShowCheckout] = useState(false);
  const modalRef = useRef<HTMLDialogElement>(null);

  const fetchClientSecret = useCallback(() => {
    // Create a Checkout Session
    return fetch("/api/embedded-checkout", {
      method: "POST",
      headers: {
        "Content-Type": "application/json",
      },
      body: JSON.stringify({ priceId: "price_1OtHkdBF7AptWZlcIjbBpS8r" }),
    })
      .then((res) => res.json())
      .then((data) => data.client_secret);
  }, []);

  const options = { fetchClientSecret };

  const handleCheckoutClick = () => {
    setShowCheckout(true);
    modalRef.current?.showModal();
  };

  const handleCloseModal = () => {
    setShowCheckout(false);
    modalRef.current?.close();
  };

  return (
    <div id="checkout" className="my-4">
      <button className="btn" onClick={handleCheckoutClick}>
        Open Modal with Embedded Checkout
      </button>
      <dialog ref={modalRef} className="modal">
        <div className="modal-box w-100 max-w-screen-2xl">
          <h3 className="font-bold text-lg">Embedded Checkout</h3>
          <div className="py-4">
            {showCheckout && (
              <EmbeddedCheckoutProvider stripe={stripePromise} options={options}>
                <EmbeddedCheckout />
              </EmbeddedCheckoutProvider>
            )}
          </div>
          <div className="modal-action">
            <form method="dialog">
              <button className="btn" onClick={handleCloseModal}>
                Close
              </button>
            </form>
          </div>
        </div>
      </dialog>
    </div>
  );
}
step 3
Handle return URL functionality by checking for the session id.
import { stripe } from "@/utils/stripe";

async function getSession(sessionId: string) {
  const session = await stripe.checkout.sessions.retrieve(sessionId!);
  return session;
}

export default async function CheckoutReturn({ searchParams }) {
  const sessionId = searchParams.session_id;
  const session = await getSession(sessionId);

  console.log(session);

  if (session?.status === "open") {
    return <p>Payment did not work.</p>;
  }

  if (session?.status === "complete") {
    return (
      <h3>
        We appreciate your business! Your Stripe customer ID is:
        {(session.customer as string)}.
      </h3>
    );
  }

  return null;
}
Stripe checkout elements
Instead of redirecting to an external stripe checkout page or even just showing an embedded checkout page, you can import individual stripe prebuilt components and hook them up to payments.
since checkout elements, our client side will need to take advantage of a payment, intent, passing a client secret and an femoral key to enable payments from the client side.
step 1: create payment intent
The first step is to set up a an API route that createw a payment intent and sends it to the frontend.
import { NextRequest, NextResponse } from "next/server";
const stripe = require("stripe")(process.env.STRIPE_SECRET_KEY);

export async function POST(request: NextRequest) {
  try {
    const { amount } = await request.json();

    const paymentIntent = await stripe.paymentIntents.create({
      amount: amount,
      currency: "usd",
      automatic_payment_methods: { enabled: true },
    });

    return NextResponse.json({ clientSecret: paymentIntent.client_secret });
  } catch (error) {
    console.error("Internal Error:", error);
    // Handle other errors (e.g., network issues, parsing errors)
    return NextResponse.json(
      { error: `Internal Server Error: ${error}` },
      { status: 500 }
    );
  }
}
step 2: create payment element
To hook up a payment element on the client side and handle payments client side securely, we need to use the client secret and ephemeral key for payments.
Across all client side payment element implementations, you'll have standard React things to implement:
- Init stripe with the
useStripe()hook - Init stripe elements with the
useElements()hook
const CheckoutPage = () => {
  const stripe = useStripe();
  const elements = useElements();
  // ...
}
- Fetch the client secret from your API route, creating a payment intent you hope to fulfill through the user checking out via the payment element.
- If client secret is available, render payment element, which should be nested inside a
<form> element - On the form
onSubmithandler, just run something like this:
async function finishPaymentIntent(elements, clientSecret) {
	const { error: submitError } = await elements.submit();

    if (submitError) throw new Error("payment did not go through")


	// runs the payment and redirects to return url
    const { error } = await stripe.confirmPayment({
      elements,
      clientSecret,
      confirmParams: {
        return_url: `http://www.localhost:3000/payment-success`,
      },
    });

    if (error) throw new Error("payment did not go through")
}
"use client";

import React, { useEffect, useState } from "react";
import {
  useStripe,
  useElements,
  PaymentElement,
} from "@stripe/react-stripe-js";

async function fetchClientSecret() {
	const response = await fetch("/api/create-payment-intent", {
      method: "POST",
      headers: {
        "Content-Type": "application/json",
      },
      body: JSON.stringify({ amount: 799 }),
    })
    const { clientSecret } = await response.json()
    return clientSecret
}

const CheckoutPage = () => {
  const stripe = useStripe();
  const elements = useElements();
  const [errorMessage, setErrorMessage] = useState<string>();
  const [clientSecret, setClientSecret] = useState("");
  const [loading, setLoading] = useState(false);

  useEffect(() => {
	 fetchClientSecret().then(secret => setClientSecret(secret))
  }, []);

  const handleSubmit = async (event: React.FormEvent<HTMLFormElement>) => {
    event.preventDefault();
    setLoading(true);

    const { error: submitError } = await elements.submit();

    if (submitError) {
      setErrorMessage(submitError.message);
      setLoading(false);
      return;
    }

    const { error } = await stripe.confirmPayment({
      elements,
      clientSecret,
      confirmParams: {
        return_url: `http://www.localhost:3000/payment-success`,
      },
    });

    if (error) {
      // This point is only reached if there's an immediate error when
      // confirming the payment. Show the error to your customer (for example, payment details incomplete)
      setErrorMessage(error.message);
    } else {
      // The payment UI automatically closes with a success animation.
      // Your customer is redirected to your `return_url`.
    }

    setLoading(false);
  };

  if (!clientSecret || !stripe || !elements) {
    return <p>Loading</p>
  }

  return (
    <form onSubmit={handleSubmit} className="bg-white p-2 rounded-md">
      {clientSecret && <PaymentElement />}

      {errorMessage && <div>{errorMessage}</div>}

      <button
        disabled={!stripe || loading}
        className="text-white w-full p-5 bg-black mt-2 rounded-md font-bold disabled:opacity-50 disabled:animate-pulse"
      >
        {!loading ? `Pay $${amount}` : "Processing..."}
      </button>
    </form>
  );
};

export default CheckoutPage;
Here's a complete hook to cover the use case:
import { useStripe, useElements } from "@stripe/react-stripe-js";
import { useState } from "react";
export const useStripeClient = (route: string) => {
  const stripe = useStripe();
  const elements = useElements();
  const [isLoading, setIsLoading] = useState(false);

  async function fetchClientSecret(body: Record<string, any>) {
    const response = await fetch(`/api/${route}`, {
      method: "POST",
      headers: {
        "Content-Type": "application/json",
      },
      body: JSON.stringify(body),
    });
    const { clientSecret } = await response.json();
    if (!clientSecret) throw new Error("client secret not found");
    return clientSecret as string;
  }

  async function finishPaymentIntent(clientSecret: string) {
    if (!elements || !stripe) throw new Error("elements not found");

    const { error: submitError } = await elements.submit();

    if (submitError) throw new Error("payment did not go through");

    // runs the payment and redirects to return url
    const { error } = await stripe.confirmPayment({
      elements,
      clientSecret,
      confirmParams: {
        return_url: `http://www.localhost:3000/payment-success`,
      },
    });

    if (error) throw new Error("payment did not go through");
  }

  async function executePayment(clientSecret: string) {
    setIsLoading(true);
    try {
      await finishPaymentIntent(clientSecret);
    } catch (error) {
      console.error(error);
    } finally {
      setIsLoading(false);
    }
  }

  return {
    isLoading,
    executePayment,
    fetchClientSecret,
  };
};
Stripe CLI
The Stripe CLI is an easy way to test out webhooks locally. here is how to install:
Installation
windows
scoop bucket add stripe https://github.com/stripe/scoop-stripe-cli.git
scoop install stripe
mac
brew install stripe/stripe-cli/stripe
docker
docker run --rm -it stripe/stripe-cli:latest
webhook local development
Setup
The first step to use the stripe CLI is to run the stripe login command.
- Run
stripe loginto login to stripe - Run
stripe listencommand like so, specifying which events you want to register the webhook for, and to which origin and route the webhook should request:
stripe listen -e checkout.session.completed --forward-to http://localhost:3000/webhook
- After successfully listening, copy the outputted webhook secret into your
.envand use it for testing your webhooks.
Listening to specific events
The -e or --event flag specifies the events you want to listen to, but by default if you omit this option, stripe forwards all events to your webhook.
stripe listen --events payment_intent.created,customer.created,payment_intent.succeeded,charge.succeeded,checkout.session.completed,charge.failed \
  --forward-to localhost:4242/webhook
If you’ve already registered your endpoint in Stripe, you can use the --load-from-webhooks-api and --forward-to flags.
stripe listen --load-from-webhooks-api --forward-to localhost:4242
Triggering events
You can easily trigger events in stripe using the stripe trigger command, which allows you to test stuff like webhook events without the hassle of manually cancelling or updating subscriptions.
stripe trigger <event-name>
To provide data for event types that need data, you would do something like this, putting the data in a file.
stripe trigger customer.created --add-object @./customer_data.json
To see the list of all the different event types, go to webhook events
Logs
To view a realtime stream of logs, you can use the stripe logs tail command:
stripe logs tail
API
The stripe api command allows you to directly call the stripe REST API and perform CRUD operations on stripe resources through the command line.
Customers
stripe api /v1/customers -d email="test@example.com" -d description="Test customer"
stripe api /v1/customers --data-raw '{"email": "json@example.com", "description": "Customer from JSON"}'
Invoices
stripe api /v1/invoices --expand 'data.charge'
Resources
Much like the API, you can access individual resources through stripe, abstracted away vithout having to specify some sort of endpoints.
It works exactly like kubectl, where the resources are different, but the CRUD methods are the same. This is the basic syntax:
stripe <resource> <CRUD_verb>
These are the list of resources:
customersproductschargespricessubscriptionspayment_intentsinvoicescheckout_sessions
These are the CRUD verbs:
list: lists all resources. Here are the additional options you can pass:create: creates a resource.retrieve <id>: returns the resource with the specified IDdelete <id>: deletes the resource with the specified IDupdate <id>: updates he resource with the specified ID
Listing
TO list any resource, all of these options are available:
--expand <property>: expands a property in the JSON that is returned--limit <n>: limits the number of items returned
get all product names
stripe products list | jq '.data[].name'
Standard workflow
This is how you can create a product
stripe products create --name "My Awesome Product" --type service
stripe prices create --unit-amount 1000 --currency usd --product prod_ABCDE
Stripe webhooks
After setting up listeners for webhooks with the stripe CLI, you can move on to registering your route handler for the webhook:
- Create a webhook event with the
stripe.webhooks.constructEventAsync()method, combining three things to create a unique webhook handshake with stripe-
- The request body as plain text
-
- The
Stripe-Signaturerequest header value
- The
-
- The webhook secret stripe gave you from the CLI or from production.
-
- Do different actions based on the webhook event type.
- Send back a 200 response to let stripe know you handled the webhook without any problems.
app.post("/stripe/webhook", async (req) => {
    const sig = req.headers.get("Stripe-Signature")!;
    const rawBody = await req.text();

	if (!this.stripeOptions.webhookSecret) {
		throw new Error("Webhook secret is not set");
	}
    if (!sig) {
	    throw new Error("Stripe signature header is not set");
    }

    const webhookEvent = await this.stripe.webhooks.constructEventAsync(
      rawBody,
      sig,
      process.env.STRIPE_WEBHOOK_SECRET
    );

	switch (webhookEvent.type) {
	      case "checkout.session.completed":
		      // when the user successfully checksout
		      // you can access their email, address, and product details
		      break;
	}

	// required to send back a 200 response if everything goes well
	return app.json({}, 200)
})
Webhook events
payment intents
payment_intent.succeeded: the customer payed, the payment went through, and thus successfully completed the payment intent
customers + subscriptions
customer.created: the customer was created.
checkout session
checkout.session.completed: the checkout session was completed.
Custom Stripe Class + API
Checkout sessions
import { Stripe } from "npm:stripe";
import { ServerURLManager } from "../utils/ServerUrlManager.ts";

interface EnvManager {
  validateKeys(): void;
  [key: string]: string | (() => void);
  STRIPE_PUBLISHABLE_KEY: string;
}

const envManager: EnvManager = {
  STRIPE_SECRET_KEY: Deno.env.get("STRIPE_SECRET_KEY")!,
  validateKeys() {
    for (const key in this) {
      if (this[key] === undefined) {
        throw new Error(`Environment variable ${key} is not set`);
      }
    }
  },
};

export const stripe = new Stripe(envManager.STRIPE_SECRET_KEY);

abstract class Product {
  abstract quantity: number;
  abstract getLineItem(): Stripe.Checkout.SessionCreateParams.LineItem;
  abstract serialize(): Record<string, any>;
}

export function manageMetadata<T extends Record<string, any>>() {
  return {
    extractMetadataFromSession: (session: Stripe.Checkout.Session) => {
      if (!session.metadata || !session.metadata?.payload) return null;

      return JSON.parse(session.metadata.payload) as T;
    },
    getMetadata: (metadata: T) => {
      return {
        payload: JSON.stringify(metadata),
      };
    },
  };
}

export class ProductWithPriceId extends Product {
  constructor(public priceId: string, public quantity: number) {
    super();
  }

  override getLineItem(): Stripe.Checkout.SessionCreateParams.LineItem {
    return {
      quantity: this.quantity,
      price: this.priceId,
    };
  }

  override serialize() {
    return this.getLineItem();
  }
}

export class ProductWithProductId extends Product {
  constructor(public productId: string, public quantity: number) {
    super();
  }

  override getLineItem(): Stripe.Checkout.SessionCreateParams.LineItem {
    return {
      quantity: this.quantity,
      price_data: {
        product: this.productId,
        currency: "usd",
      },
    };
  }

  override serialize() {
    return this.getLineItem();
  }
}

export class DynamicProduct extends Product {
  constructor(
    public quantity: number,
    public priceInDollars: number,
    public productOptions: {
      productName: string;
      imageUrls?: string[];
      description?: string;
      payloadData?: Record<string, string>;
    }
  ) {
    super();
  }

  override getLineItem(): Stripe.Checkout.SessionCreateParams.LineItem {
    return {
      quantity: this.quantity,
      price_data: {
        currency: "usd",
        product_data: {
          name: this.productOptions.productName,
          images: this.productOptions.imageUrls || [],
          description: this.productOptions.description || "",
          metadata: this.productOptions.payloadData || {},
        },
        unit_amount: this.priceInDollars * 100, // Stripe requires the amount in cents
      },
    };
  }

  override serialize(): Record<string, any> {
    return this.getLineItem();
  }
}

class StripeManager {
  constructor(
    public stripe: Stripe,
    private stripeOptions: {
      successCallbackUrl: string;
      cancelCallbackUrl: string;
      webhookUrl?: string;
      webhookSecret?: string;
    }
  ) {}

  async createPaymentSession(
    products: Product[],
    metadata?: Record<string, any>
  ) {
    try {
      const response = await this.stripe.checkout.sessions.create({
        payment_method_types: ["card", "cashapp", "link"],
        mode: "payment", // for one-time payment
        cancel_url: this.stripeOptions.cancelCallbackUrl,
        success_url: this.stripeOptions.successCallbackUrl,
        line_items: [...products.map((product) => product.getLineItem())],
        metadata,
      });
      const checkoutPageUrl = response.url;
      return checkoutPageUrl;
    } catch (e) {
      console.error("Error creating Stripe session:", e);
      return null;
    }
  }

  async getProductById(productId: string) {
    return await this.stripe.products.retrieve(productId);
  }

  async getPriceById(priceId: string) {
    return await this.stripe.prices.retrieve(priceId);
  }

  async onWebhookCall(
    req: Request,
    cbs: {
      // when the checkout session is completed for subscription or one time payment
      onCheckoutSessionCompleted?: (
        session: Stripe.Checkout.Session
      ) => Promise<void>;
      // when the user cancels the ckeckout session, you can grab their email and spam them
      onCheckoutSessionExpired?: (
        session: Stripe.Checkout.Session
      ) => Promise<void>;
      onSubscriptionUpdated?: (
        subscription: Stripe.Subscription
      ) => Promise<void>;
      // when the subscription is deleted, you need to modify the record in the database to remove premium features
      onSubscriptionDeleted?: (
        subscription: Stripe.Subscription
      ) => Promise<void>;
      // when the user's credit card is revoked and unable to pay, either rmeove their subscription or mark it to be revoked in the future
      onInvoicePaymentFailed?: (invoice: Stripe.Invoice) => Promise<void>;
      // when the invoice is paid, you can mark the user as premium again
      onInvoicePaid?: (invoice: Stripe.Invoice) => Promise<void>;
    }
  ) {
    if (!this.stripeOptions.webhookSecret)
      throw new Error("Webhook secret is not set");
    const rawBody = await req.text();
    const sig = req.headers.get("Stripe-Signature")!;
    if (!sig) throw new Error("Stripe signature header is not set");

    const webhookEvent = await this.stripe.webhooks.constructEventAsync(
      rawBody,
      sig,
      this.stripeOptions.webhookSecret!
    );

    switch (webhookEvent.type) {
      case "checkout.session.completed": {
        const session = await stripe.checkout.sessions.retrieve(
          webhookEvent.data.object.id,
          {
            expand: ["line_items"],
          }
        );
        await cbs.onCheckoutSessionCompleted?.(session);
        break;
      }
      case "checkout.session.expired": {
        const session = await stripe.checkout.sessions.retrieve(
          webhookEvent.data.object.id,
          {
            expand: ["line_items"],
          }
        );
        await cbs.onCheckoutSessionExpired?.(session);
        break;
      }
      case "customer.subscription.updated": {
        const subscription = await stripe.subscriptions.retrieve(
          webhookEvent.data.object.id
        );
        await cbs.onSubscriptionUpdated?.(subscription);
        break;
      }
      case "customer.subscription.deleted": {
        const subscription = await stripe.subscriptions.retrieve(
          webhookEvent.data.object.id
        );
        await cbs.onSubscriptionDeleted?.(subscription);
        break;
      }
      case "invoice.payment_failed": {
        const invoice = await stripe.invoices.retrieve(
          webhookEvent.data.object.id!
        );
        await cbs.onInvoicePaymentFailed?.(invoice);
        break;
      }
      case "invoice.paid": {
        const invoice = await stripe.invoices.retrieve(
          webhookEvent.data.object.id!
        );
        await cbs.onInvoicePaid?.(invoice);
        break;
      }
    }
  }
}
Prices
stripe.prices.retrieve(priceId): gets thePriceobject from the specified price id
customers
stripe.customers.list(options): queries and returns a list of all customers that fit the query criteria.stripe.customers.create(options): creates a stripe customer. The email is required.
export class StripeCustomerManager<
  MetadataType extends Record<string, any> = Record<string, any>
> {
  constructor(
    public stripe: Stripe,
    public metadataSchema: z.ZodSchema<MetadataType>
  ) {}

  createMetadata(metadata: MetadataType) {
    const data = this.metadataSchema.parse(metadata);
    return {
      payload: JSON.stringify(data),
    };
  }

  extractMetadata(customer: Stripe.Customer) {
    const { success, data } = this.metadataSchema.safeParse(
      JSON.parse(customer.metadata.payload)
    );
    if (!success) {
      return null;
    }
    return data;
  }

  async getCustomerByEmail(email: string) {
    const customers = await stripe.customers.list({
      email,
      limit: 1,
    });
    if (customers.data.length === 0) {
      return null;
    }
    return customers.data[0];
  }

  async createCustomer(email: string, metadata?: Record<string, any>) {
    const customer = await stripe.customers.create({
      email,
      metadata,
    });
    return customer;
  }
}
subscriptions
export class StripeSubscriptionManager<
  MetadataType extends Record<string, any> = Record<string, any>
> {
  constructor(
    public stripe: Stripe,
    public metadataSchema: z.ZodSchema<MetadataType>
  ) {}

  createMetadata(metadata: MetadataType) {
    const data = this.metadataSchema.parse(metadata);
    return {
      payload: JSON.stringify(data),
    };
  }

  extractMetadata(subscription: Stripe.Subscription) {
    const { success, data } = this.metadataSchema.safeParse(
      JSON.parse(subscription.metadata.payload)
    );
    if (!success) {
      return null;
    }
    return data;
  }

  async getSubscriptionFromCustomerId(customerId: string) {
    const subscriptions = await stripe.subscriptions.list({
      customer: customerId,
      limit: 1,
    });
    if (subscriptions.data.length === 0) {
      return null;
    }
    return subscriptions.data[0];
  }

  async function updateSubscriptionWithNewPlan(existingSubscription: StripeSubscription, newPriceId: string) {
const updatedSubscription = await stripe.subscriptions.update(
      existingSubscription.id,
      {
        proration_behavior: "create_prorations",
        items: [
          {
            id: existingSubscription.items.data[0].id,
            price: priceId,
          },
        ],
        billing_cycle_anchor: "now", // triggers immediate proration
        payment_behavior: "pending_if_incomplete",
      }
    );

    // 2. Create a new invoice (optional, since Stripe may auto-create it, but you can force it)
    const invoice = await stripe.invoices.create({
      customer: customer.id,
      subscription: updatedSubscription.id,
      auto_advance: true, // auto-finalize so it generates payment_intent
    });

    // 3. Wait for invoice to finalize (best effort)
    if (!invoice.id) {
      return null
    }
    const finalizedInvoice = await stripe.invoices.retrieve(invoice.id, {
      expand: ["payment_intent"],
    });
    return finalizedInvoice
  }

  async getSubscriptionFromSubscriptionId(subscriptionId: string) {
    const subscription = await stripe.subscriptions.retrieve(subscriptionId);
    return subscription;
  }

  async cancelMonthlySubscription(currentSubscription: Stripe.Subscription) {
    const createdAt = new Date(currentSubscription.created * 1000);
    const cancelDate = new Date();
    cancelDate.setFullYear(new Date().getFullYear());
    // if cancelling in the same month, push to next month
    if (cancelDate.getMonth() === createdAt.getMonth()) {
      cancelDate.setMonth(new Date().getMonth() + 1);
    } else {
      cancelDate.setMonth(new Date().getMonth());
    }
    cancelDate.setDate(createdAt.getDate() + 1);
    const subscription = await stripe.subscriptions.update(
      currentSubscription.id,
      {
        cancel_at: Math.floor(cancelDate.getTime() / 1000), // Convert to Unix timestamp
      }
    );
    return subscription;
  }
}
polar
NextJS
When working in polar, there is a difference between test mode and live mode. Local and live mode have completely different keys and websites, so be careful.
- live mode: do everything in polar.sh
- test mode: do everything in sandbox verison
Creating a checkout session
When it comes to creating checkout sessions, you have two popular options:
- programmatic creation: using the polar sh payment SDK to have full control over creating a checkout session, giving you the ability to prefill certain fields.
- prebuilt payment links: You can create prebuilt payment links for a product, which lets you go for a no-code approach, especially if you don't need a database. But this prevents from prefilling certain fields like customer email.
To create a checkout session, you need to use the polar SDK to create a checkout session. This programmatic approach has the advantage of prefilling links.
The first thing you'll need to is to install the @polar-sh/sdk library and create this code:
import { Polar } from "@polar-sh/sdk";

const polar = new Polar({
  accessToken: verifyEnvironmentVariable("POLAR_ACCESS_TOKEN"),
  server: process.env.NODE_ENV === "development" ? "sandbox" : "production",
});
IMPORTANT
If you set to "sandbox" mode, be extra sure to use only keys and secrets from the sandbox version of polar, not the live one. Or else that will not work at all.
Then here is how you would create a route that handles creating the checkout session
import { verifyEnvironmentVariable } from "@/utils/verifyEnv";
import { getUserRouteHandler } from "@/actions/auth";
import { polarDal } from "@/services/polarDal";
import { NextResponse } from "next/server";

export async function GET(request: Request) {
  try {
    const productId =
      process.env.NODE_ENV === "production"
        ? "7c4995fd-044c-456b-acfc-9f17c3651406"
        : "b5c23b35-96e0-4d6d-888b-bd3440a76ed5";
    const user = await getUserRouteHandler(request);

    if (user instanceof NextResponse) {
      return user;
    }

    console.log("Creating checkout session for user:", user.email);

    const { checkout, checkoutUrl } = await polarDal.createCheckout({
      productId,
      userInfo: {
        email: user.email,
        id: user.id,
      },
      successUrl: verifyEnvironmentVariable("POLAR_SUCCESS_URL"),
    });

    console.log("Checkout session created successfully:", checkout.id);
    return NextResponse.redirect(checkoutUrl);
  } catch (error) {
    console.error("Error creating checkout session:", error);

    // Check if it's an authentication error
    if (error instanceof Error && error.message.includes("invalid_token")) {
      return NextResponse.json(
        {
          error: "Authentication failed. Please check your POLAR_ACCESS_TOKEN.",
          details: "The access token may be expired, revoked, or invalid.",
        },
        { status: 401 }
      );
    }

    return NextResponse.json(
      { error: "Failed to create checkout session" },
      { status: 500 }
    );
  }
}
Here is a class covering the basic of using the polar SDK.
import { verifyEnvironmentVariable } from "@/utils/verifyEnv";
import { Polar } from "@polar-sh/sdk";
import { Checkout } from "@polar-sh/sdk/models/components/checkout.js";
import { Subscription } from "@polar-sh/sdk/models/components/subscription.js";

const polar = new Polar({
  accessToken: verifyEnvironmentVariable("POLAR_ACCESS_TOKEN"),
  server: process.env.NODE_ENV === "development" ? "sandbox" : "production",
});

export class PolarManager {
  constructor(private polar: Polar) {}
  async createCheckout({
    productId,
    userInfo,
    successUrl,
  }: {
    productId: string;
    successUrl: string;
    userInfo: {
      email: string;
      id: string;
    };
  }) {
    const checkout = await this.polar.checkouts.create({
      products: [productId],
      customerEmail: userInfo.email,
      successUrl,
      externalCustomerId: userInfo.id,
      customerMetadata: {
        userId: userInfo.id,
        email: userInfo.email,
      },
    });
    const searchParams = new URLSearchParams();
    searchParams.append("customer_email", userInfo.email);
    return {
      checkoutUrl: `${checkout.url}?${searchParams.toString()}`,
      checkout,
    };
  }

  async getCustomerFromCheckout(userId: string, checkout: Checkout) {
    const cus1 = await this.getCustomerById(
      checkout.customerId || checkout.paymentProcessorMetadata.customer_id
    );
    if (cus1) {
      return cus1;
    }
    const cus2 = await this.getCustomerByUserId(userId);
    return cus2;
  }

  async getCheckout(checkoutId: string) {
    const checkout = await this.polar.checkouts.get({
      id: checkoutId,
    });
    return checkout;
  }

  async getCustomerByUserId(userId: string) {
    const customer = await this.polar.customers.getExternal({
      externalId: userId,
    });
    return customer;
  }

  async getCustomerById(customerId: string) {
    const customer = await this.polar.customers.get({
      id: customerId,
    });
    return customer;
  }

  async getImportantInfoFromSubscription(subscription: Subscription) {
    const subscriptionStartDate = subscription.startedAt;
    const interval = subscription.recurringInterval;
    const cancelAtPeriodEnd = subscription.cancelAtPeriodEnd;
    const endsAt = subscription.endsAt;
    const customerId = subscription.customerId;
    const subscriptionId = subscription.id;
    const productId = subscription.productId;
    const productPriceId = subscription.product.prices[0].id;
    const status = subscription.status;
    return {
      subscriptionStartDate,
      interval,
      cancelAtPeriodEnd,
      endsAt,
      customerId,
      subscriptionId,
      productId,
      productPriceId,
      status,
    };
  }
}
Redirecting to customer portal
You can redirect to customer portal like so:
import { getUserRouteHandler } from "@/actions/auth";
import db from "@/drizzle/db";
import { verifyEnvironmentVariable } from "@/utils/verifyEnv";
import { CustomerPortal } from "@polar-sh/nextjs";
import { NextRequest, NextResponse } from "next/server";

export const GET = CustomerPortal({
  accessToken: verifyEnvironmentVariable("POLAR_ACCESS_TOKEN"),
  // a way to dynamically get the customer id of the current authenticated user
  getCustomerId: async (req: NextRequest) => {
    const user = await getUserRouteHandler(req);
    if (user instanceof NextResponse) {
      throw new Error("User not authenticated");
    }
    const userFromDb = await db.query.users.findFirst({
      where: (users, { eq }) => eq(users.email, user.email),
    });
    if (!userFromDb) {
      throw new Error("User not found");
    }
    if (!userFromDb.subscriptionInfo?.customerId) {
      throw new Error(
        "User has no subscription or customer id associate with it."
      );
    }
    return userFromDb.subscriptionInfo.customerId;
  }, // Function to resolve a Polar Customer ID
  server: "sandbox", // Use sandbox if you're testing Polar - omit the parameter or pass 'production' otherwise
});
accessToken: the access tokengetCustomerId: a callback you must implement, which from a request, you're supposed to return the customer ID associated with that request.
Webhooks
To set up webhooks, go to the polar sidebar -> settings -> webhooks, and then you can create a webhook secret, specify the receiving API endpoint, and then select the events you want to listen for.
You can go here for more info:

Here is how you can set up webhooks in nextJS:
import { Webhooks } from "@polar-sh/nextjs";

export const POST = Webhooks({
  webhookSecret: verifyEnvironmentVariable("POLAR_WEBHOOK_SECRET"),
  onPayload: async (payload) => {
    // Handle the payload
    // No need to return an acknowledge response
    console.log("=== WEBHOOK PAYLOAD RECEIVED ===");
    console.log("Event type:", payload.type);
    console.log("Event data:", JSON.stringify(payload.data, null, 2));
    console.log("=================================");
  },
  // listen to more events.
})
Here is a list of all webhook events: