vs-code
https://stevekinney.com/courses/visual-studio-code
Keyboard shortcuts
ctrl + shift + right arrow: selects up (idk how to explain this)ctrl + shift + left arrow: selects down (idk how to explain this)ctrl + d, ctrl + k: when highlighting instances of text, use ctrl + k to skip instancesctrl + p + p: ctrl peepee goes back to the most recent filectrl + k: bring up list of keybindingsctrl + b: toggle sidebar open and closedctrl + w: closes the currently opened filealt + up arrow: moves code line upalt + up down: moves code line downalt + click: creates an extra cursor where you click to get multiple cursorsctrl + u: undoes a misplaced cursor when dealing with creating multiple cursorsctrl + space: brings up intellisense suggestionsctrl + shift + space: brings up parameter info when pressing this keyboard shortcut inside the parenthesis of a function call.ctrl + l: highlights lines of textctrl + yorctrl + shift + z: undoctrl + [: tabs to the rightctrl + ]: tabs to the leftctrl + shift + k: deletes current linectrl + enter: moves cursor down a line, creating an empty linectrl + shift + enter: moves cursor up a line, creating an empty linectrl + /: comments out a line or lines of selected codeshift + alt + /orshift + option + /: comments out only the selected text. Useful for fine grained commenting-outctrl + tab: switch between tabs in VScodectrl + <panel/tab index>: switches between panels in VScode. There are 9 panels. If there are no panels open, it just switches between tabs.ctrl + shift + tilde:brings up a terminal in vscode. In mac, you use ctrl, not command.ctrl + tilde: switches focus to terminalctrl + shift + f: global search across workspacefn + f2: refactor across codebase (much better than ctrl + d )ctrl + shift + o: searches for symbols in the current file (same as opening up command palette and typing@prefix to initiate symbol search mode)
collapsing shortcuts
- Collapse All (Fold All): Press Ctrl + K, Ctrl + 0 (Windows/Linux) or ⌘K ⌘0 (Mac) to fold all top-level sections in the current file, including classes, functions, and regions
Essentials
Command Palette
Press ctrl + p to bring up a file searcher, which is useful for searching for files through a large codebase. There are some special symbols you can type to execute different searching behaviors:
@: You can also type@in the file search input to see all the code symbols in the current file.#: Shows all code symbols in the current file:<number>: Goes to the specified line in your current file, like:20to jump to line 20.
Find and replace
With find and replace you can search by regex and when performing global find and replace across your entire codebase, you can also exclude certain files based on a glob pattern.
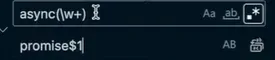
The below example shows how to use regex search with capturing groups:
- Create a capturing group with parentheses
() - Refer to the capturing group with
$1, etc.
Emmet
Emmet is a way to use shortcuts in jsx or HTML that allows you to type HTML markup faster
Here are the three basic operators:
>: direct parent operator: the left hand element will nest the right hand element.*: multiplication operator - duplicates the element on the left hand side.+: adjacency operator - adds the element on the right hand side adjacently
Here are some examples:
div>ul>li: Creates a<div>with a nested<ul>and that also has a nested<li>div*3: Creates three<div>tagheader+section: Creates a header then a section
You can nest content as well inside using curly braces {}. There are several things you can do in terms of nesting content tricks
div{hello}: creates a<div>tag with "hello" as its text contentdiv{Item $}*3: creates 3<div>tags with incrementing numbers based on$as a placeholder, which would produce this content:
<div>Item 1</div>
<div>Item 2</div>
<div>Item 3</div>
Snippets
Snippets are a way to type a prefix in a file and to write out some boilerplate in the code file. This is very useful if you find yourself copying and typing the same boilerplate over and over again.
You can create workspace or global snippets by opening up the command pallete and selecting create snippet. Then either a global snippet will be created that works across all workspaces, or you can create workspace-specific snippets inside the .vscode folder.
{
  "Snippet Name": {
    "prefix": "trigger",
    "body": ["// Code line 1", "// Code line 2", "// ..."],
    "description": "Snippet description"
  }
}
prefix(String, Required): This is the trigger word or characters you type in the editor to activate the snippet suggestion. When you type theprefix, Visual Studio Code will suggest your snippet in the IntelliSense dropdown. Choose a short, memorable, and unique prefix to avoid conflicts with existing commands or keywords.body(Array of Strings, Required): This is the core of the snippet – the actual code block that will be inserted. Each element in the array represents a line of code. Visual Studio Code will join these strings and insert them into the document, respecting indentation and line breaks. You can use placeholders, variables, and choices within thebodyto make your snippets dynamic.description(String, Optional): A brief explanation of what the snippet does. This description is displayed in the IntelliSense suggestion list, helping you understand the snippet’s purpose when choosing from multiple suggestions. Providing clear descriptions is crucial for managing a large collection of snippets.scope(String, Optional): Defines the languages or file types where the snippet should be available. If omitted, the snippet is considered global and will be available in all languages. You can specify a single language identifier (e.g.,"javascript","python") or a comma-separated list of language identifiers (e.g.,"javascript,typescript"). You can find a list of language identifiers here.
Dynamic jumping cursors
Using the placeholders $1 and $2, etc., are placeholders to jump to when the user tabs to them and are empty, meant to be populated by the user.
You can move around these placeholders with Tab or Shift+Tab
$0will always be the last tabbable spot.- You can reuse the same placeholders as many times as you want, which will cause multiple cursors effect.
You can take this a step further by providing default strings for the tabbable placeholders by using colon syntax. You use placeholder names like ${1:variableName} to provide a default value or hint for the placeholder.
"for/of Loop": {
    "prefix": "forloop",
    "body": [
        "for (let i = 0; i < ${1:array}.length; i++) {",
        "\tconst ${2:element} = ${1:array}[i];",
        "\t${0:// body}",
        "}"
    ],
    "description": "Basic for loop in JavaScript"
}
In the above example, the string "array" was the default value for the first and second tabbable placeholder.
You can also provide a dropdown list of options to choose from, which vscode will display in a quick pick menu.
"Print to console": {
	"prefix": "log",
	"body": [
		"console.${1|log,warn,error,info,table}($2)"
	],
	"scope": "javascript,typescript"
}
Built in snippets variables
There are a list of built in global snippet variables you can access that VSCode allows you to use, all that need the ${} syntax to be interpolated:
- File and Path Variables:
${TM_FILENAME}: The current filename (e.g.,my_script.js).${TM_FILENAME_BASE}: The current filename without the extension (e.g.,my_script).${TM_DIRECTORY}: The directory of the current file.${TM_FILEPATH}: The full file path of the current file.${WORKSPACE_NAME}: The name of the opened workspace or folder.${WORKSPACE_FOLDER}: The path of the opened workspace or folder.
- Date and Time Variables:
${CURRENT_YEAR}: The current year (e.g.,2025).${CURRENT_YEAR_SHORT}: The current year in two digits (e.g.,25).${CURRENT_MONTH}: The month as two digits (e.g.,03).${CURRENT_MONTH_NAME}: The full name of the month (e.g.,March).${CURRENT_MONTH_NAME_SHORT}: The short name of the month (e.g.,Mar).${CURRENT_DATE}: The day of the month as two digits (e.g.,07).${CURRENT_DAY_NAME}: The name of the day (e.g.,Friday).${CURRENT_DAY_NAME_SHORT}: The short name of the day (e.g.,Fri).${CURRENT_HOUR}: The current hour in 24-hour format (e.g.,17).${CURRENT_MINUTE}: The current minute (e.g.,08).${CURRENT_SECOND}: The current second (e.g.,14).${CURRENT_TIMEZONE_OFFSET}: The timezone offset from UTC (e.g.,-0700for MST).${CURRENT_TIMESTAMP}: The current Unix timestamp.
- User and Environment Variables:
${CLIPBOARD}: The content of your clipboard.${RANDOM}: 6 random Base-16 characters.${RANDOM_HEX}: A random Base-16 number.${UUID}: A version 4 UUID.${USER_NAME}: Your operating system username.
This is an example that puts the currently selected code in a try-catch block:
  "Try Catch Block": {
    "scope": "javascript,typescript",
    "prefix": "tc",
    "body": [
      "try {",
      "  $TM_SELECTED_TEXT",
      "} catch (error) {",
      "$1",
      "  console.error('Error occurred:', error);",
      "} finally {",
      "  console.timeEnd('$2');",
      "}"
    ],
    "description": "Put copied text in a try catch block."
  }
VSCode Tips and Tricks
Region
You can have a super cool header in your minimap with a simple js comment like // region <REGION_NAME>, like so:
// region REGION_NAME
This is great for organization.
Workspace specific configuration with .vscode
Let's talk about all the different files you can have in .vscode, which is the folder that contains all JSON configuration files for your workspace settings.
Here are the different files you can have in your .vscode:
| File | Purpose |
|---|---|
settings.json | Overrides user settings specifically for this workspace. |
launch.json | Configures debugging setups (e.g., how to launch a program, attach debugger). |
tasks.json | Defines custom tasks (e.g., build scripts, linters, test runners). |
extensions.json | Recommends extensions for the current workspace. |
c_cpp_properties.json | (C/C++ only) Defines IntelliSense settings for the C/C++ extension. |
| devcontainers | builds a devcontainer for the workspace from a devcontainer.json |
| snippets | has workspace-level snippets |
extensions.json
The extensions.json is going to look like this, and it shows up recommended extension to install for this workspace, which is super useful for collaboration.
{
  "recommendations": [
    "dbaeumer.vscode-eslint",
    "esbenp.prettier-vscode"
  ]
}
tasks.json
Tasks in VsCode are essentially like npm scripts except they can be run from the command palette. You just list them in a tasks.json file first and describe each individual task as an object in the "tasks" array:
{
  "version": "2.0.0",
  "tasks": [
    {
      "label": "tsc: build the project", // what shows up in command palette
      "type": "shell",       // type of script to run (shell for linux)
      "command": "tsc",      // the command to run
      "problemMatcher": "$tsc", // use tsc tool to parse error output,
      "group": {              // create group for additional organization
        "kind": "build",
        "isDefault": true,
      },
    }
  ]
}
Here are the keys that make up a single task:
"label": the task name"type": just use"shell"to run shell commands."detail": the task description"command": the shell command to run"group": Defines the task's group and whether it's the default for that group."kind": A string indicating the group type. Common kinds include:"build": For compilation or transpilation tasks."test": For running tests."clean": For cleaning build artifacts."none": No specific group.
"isDefault": A boolean. If true, this task will be executed when you run the group's default action (e.g., Terminal > Run Build Task...).
"problemMatcher": This is a crucial property for integrating task output with VS Code's problem panel. It specifies how VS Code should parse the output of your task to identify errors, warnings, and information messages. you have three important types of problem matchers you can choose:"$tsc": TypeScript compiler"$tsc-watch": TypeScript compiler in watch mode"$eslint": ESLint
isBackground: a boolean that if set to true, runs the task as a daemon in the background, like running a server.
NOTE
VSCode will automatically detect npm scripts from package.json and add them as recognizable tasks it can run.
Here is another example of creating tasks:
{
  "version": "2.0.0",
  "tasks": [
    {
      "label": "Lint",
      "type": "npm",
      "script": "lint",
      "group": "build", // Allows Run Build Task to trigger lint
      "problemMatcher": ["$eslint-stylish"] // Highlights ESLint errors in Problems pane
    },
    {
      "label": "Test",
      "type": "shell",
      "command": "npm run test", // Or a direct test runner command
      "group": "test", // Allows Run Test Task to trigger tests
      "problemMatcher": [] // (Attach a matcher if test output can be parsed for errors)
    },
    {
      "label": "Build (Frontend)",
      "type": "shell",
      "command": "npm run build", // Runs Vite or tsc build for frontend
      "problemMatcher": ["$tsc"] // Use TypeScript matcher to catch type errors
    },
    {
      "label": "Dev Server (Frontend)",
      "type": "npm",
      "script": "dev", // Launches Vite dev server
      "isBackground": true, // Mark as long-running background task
      "problemMatcher": "$tsc-watch" // Treat TS compile errors during dev
    }
  ]
}
Using variables
Here is how you can use variables in VSCode tasks:
${workspaceFolder}: The path to the folder opened in VS Code.${workspaceFolderBasename}: The name of the folder opened in VS Code (without the path).${file}: The current opened file.${relativeFile}: The current opened file relative toworkspaceFolder.${fileBasename}: The current opened file's basename.${fileBasenameNoExtension}: The current opened file's basename without its extension.${fileDirname}: The current opened file's dirname.${fileExtname}: The current opened file's extension.${lineNumber}: The current selected line number in the active file.${selectedText}: The current selected text in the active file.${pathSeparator}: The path separator used by the operating system (/on Linux/macOS,\on Windows).${cwd}: gets the current working directory in which the task is run from
bESIDES the global variables, you also have three possible ways to interpolate different types of variables:
${config:name}: Reads a VS Code configuration setting (e.g.,${config:editor.tabSize}).${env:VAR_NAME}: Reads an environment variable (e.g.,${env:PATH}).${input:variableName}: Prompts the user for input (requires aninputssection intasks.json).
Input variables
When running a task, you can also display a VSCode quick picker to get user input from a list of choices and store that as a variabel you can use in your app:
Variables are defined in a separate "inputs" key and can therefore be used across all tasks and are not just task-specific.
You can reference an input variable and extract its value using the ${input:variable_name} syntax.
- In this example below, we create a
whichEnvvariable that is a string type, and has three options for the possible values it can, and also provides and default value.
{
  "version": "2.0.0",
  "tasks": [
    {
      "label": "Deploy",
      "type": "shell",
      "command": "npm run deploy -- --env ${input:whichEnv}",
    },
  ],
  "inputs": [
    {
      "id": "whichEnv", // variable name
      "type": "pickString", // variable type
      "description": "Select environment to deploy to",
      "options": ["development", "staging", "production"], // enum options
      "default": "development",  // default value
    },
  ],
}
ENV variables
You can define env variables and other shell defaults to configure the shell environment before the task is run, using the "options" key:
"options": {
  "cwd": "${workspaceFolder}/src",
  "env": {
    "NODE_ENV": "development"
  }
}
Running compound tasks
You can chain tasks together and run multiple tasks in a sequence before executing a task. Of course, you could just do the same thing in a bash script.
{
  "version": "2.0.0",
  "tasks": [
    {
      "label": "Task A",
      "type": "shell",
      "command": "echo Task A"
    },
    {
      "label": "Task B",
      "type": "shell",
      "command": "echo Task B"
    },
    {
      "label": "Run A and B",
      "dependsOn": ["Task A", "Task B"],
      "dependsOrder": "sequence",
      "problemMatcher": []
    }
  ]
}
"dependsOn": an array of task labels which specifies the tasks you need to run before executing this task."dependsOrder": if set to"sequence", then it will execute the tasks in sequential order, not parallel. This is important if order of the tasks matters. The order will be the same as the order in the"dependsOn"key.
There are three possible values you can have for the "dependsOrder" key, all with different behaviors:
"sequence": the default, which runs dependent tasks in order"parallel": runs all tasks in parallel"any": runs all tasks in parallel, but the main task will start as soon as at least on of the dependent tasks finishes. This is useful for race conditions and the like.
Automatic tasks
If you want the power of a devcontainer without being in a devcontainer
{
  "version": "2.0.0",
  "tasks": [
    {
      "label": "Setup Environment",
      "type": "shell",
      "command": "nvm use",
      "runOptions": {
        "runOn": "folderOpen"
      }
    }
  ]
}